Multiple Oblique Images

As dental imaging technicians, it is our job to provide the clinician with as much information as possible. The i-CAT has the ability to provide vast amounts of data and we need to organize it in such a fashion that allows easy interpretation of the images. With that thought in mind, it becomes apparent that one size does not fit all.
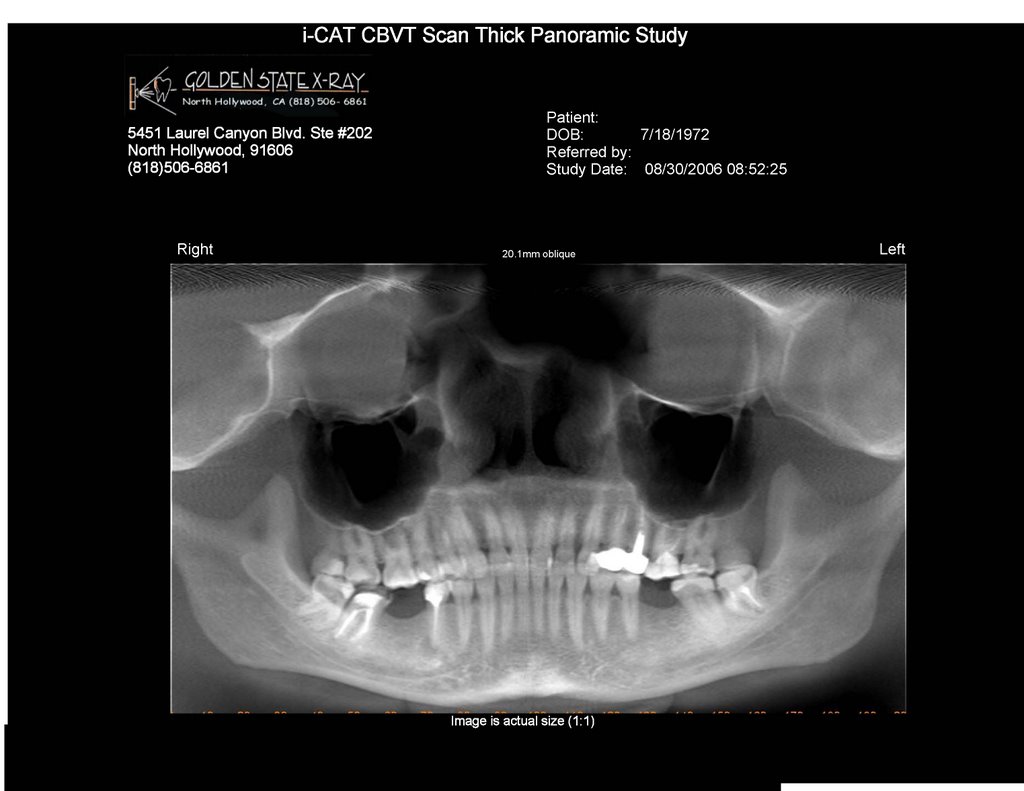
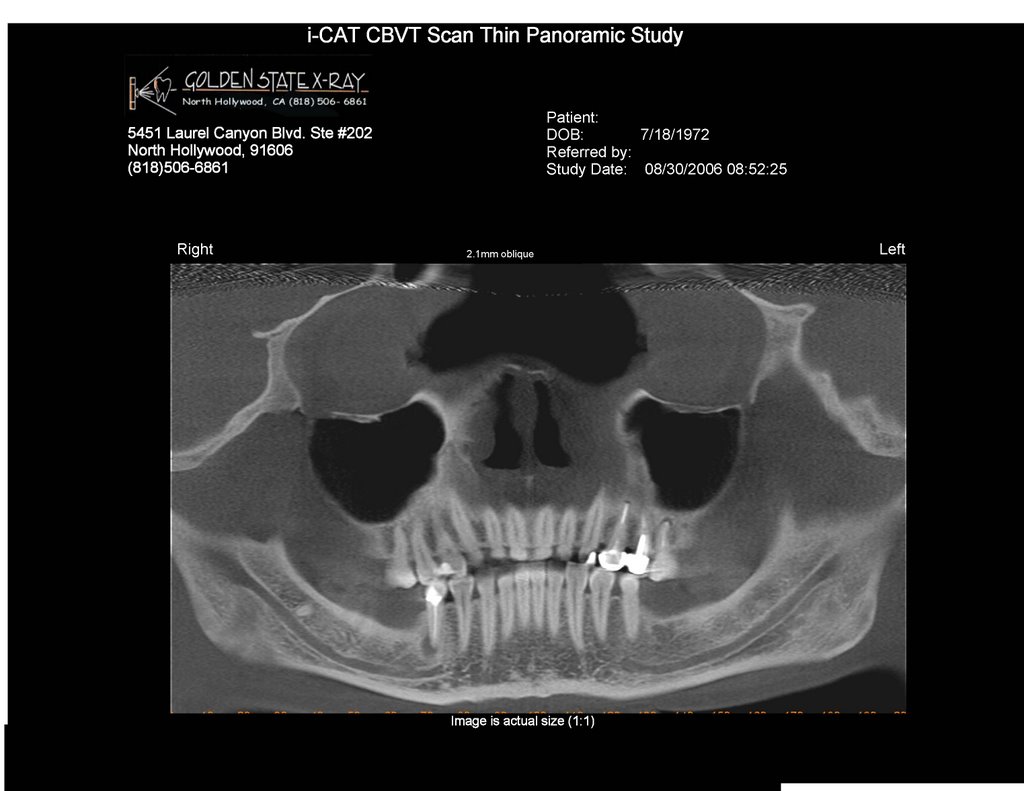
For a typical implant case we may include numerous oblique views. In this example, the doctor requested a full height scan with the focus on the mandible for possible implant placements. In order to enhance the mandibular nerve canal, we used a 2.1mm thickness oblique. You will notice that the nerve virtually “pops” out of the image and is easily seen. The focus in this particular image is only the mandibular nerve, thus the maxilla is not completely visible. If it were possible, I would like to be able to ‘crop’ the maxilla out to avoid confusion. In fact, upon closer examination you will notice that many of the teeth ‘disappear’ in the thin 2.1mm oblique image. This image verifies that the mandibular nerve is not in the same vertical plane as the teeth. Do not confuse the vertical plane with the long axis of the existing dentition! Anything outside of the 2.1mm slice thickness will not be visible, so we also include a “thick” oblique of 20.1mm that mimics the typical panoramic image that the clinician finds very familiar. The i-CAT easily allows thicker oblique views; however, the resultant image tends to possess significantly less detail.
For the cross sectional images we used a 12.3mm thickness, which makes the mandibular nerve still visible yet contains all of the patient’s mandibular anatomy. Only one page of the cross sectional images is shown for clarification. Notice in the “thin” 2.1mm and “thick” 20.1mm oblique images, we DO NOT include the scale because of the possibility that the clinician may attempt to take measurements from these images and compare it directly to the cross sectional images. We want the doctor to use ONLY the one oblique view that the cross sectional images were originally derived from for that particular arch.
The clinician is also provided with cross sectional images of the lateral and coronal TMJ images (not shown) on full height scans. On several occasions, we found many patients who exhibited absolutely no symptoms who had posterior displaced condyles, indicative of a displaced disk. On other patients there was a complete lack of joint space! In all these cases, the clinicians’ were very appreciative of the i-CAT images since they were able to convey these findings with the patient to discuss possible treatment plans. Most of the patients chose not to seek treatment for the TMJ and the clinicians were able to have the patients sign waiver forms declining treatment. Imagine the legal dramas that would have arose had the patients not had the i-CAT scan!
NOTE: The numbers for each oblique image is added manually. i-CAT Vision along with DICOM and PDF files are included with every scan.
posted by Eric Iwamoto at 10/06/2006 03:51:00 PM
![]()
![]()

3 Comments:
Eric,
How did you eliminate the scale when you printed out the different thickness panos?
I am following the same format for my reports minus the TMJ.
I am really trying to integrate the iCAT vision into the minds of the doctors. Spending an enormous amount of time with the referring docs trying to get them to see the benefits of the viewer.
I took a 40 second .25 scan on a 17 year old who has an impacted #5 (upper right first bicuspid). I honestly could not tell the improvement from a 20 .3 scan.
I seem to recall Arun telling me that there was very little difference between the 40 second .3mm scan and the 20 second .3mm scan, so it makes sense that there would also be very little difference between the .3mm and the .25mm. I think you need to do the 40 second .2mm scan to get the real noticable difference, which I have discovered to be AMAZING on i-CAT Vision, since you can view the cross sections in .2mm slices, which is WAY better than the 1mm slices using the Xoran software. But then, that's only my opinion.
Thank you Amon, your suggestion works perfectly! Having the ability to block out the opposing arch eliminates the possibility that the clinician might use it as a reference for the wrong arch. For example, if the image is tilted up to align the mandible we do not want the clinician to use that particular oblique image for the maxilla.
To eliminate the scale: select the desired oblique image, go into modify template and click on the blue dot at the lower edge of the image that displays the lower portion of the Region of Interest (ROI). Click and drag the blue dot upwards until the scale disappears.
For every new i-CAT referral, it is to your benefit to schedule a convenient time with the dentist to explain (in person) the desired preferences. Is the clinician using third party software? Currently, most third party software programs are unable to optimize the .2mm ultra high resolution DICOM data. It will also be your opportunity to explain the difference between the full height scan and .2mm ultra high resolution single arch scan. Does the dentist want the images tilted in all three planes at each specific implant site? Some clinicians prefer only one axis of tilt (see example under Multiple Obliques Images). In other words, we must present the data in the form that the clinician prefers. This will also be your golden opportunity to demonstrate the greatly reduced radiation dose over traditional medical CT plus you can easily explain the tremendous capabilities of i-CAT Vision. A considerable side benefit is that once you have established how i-CAT scans brings tremendous value to the clinician and their patients, the cost of the scan becomes a non-issue.
Post a Comment
<< Home